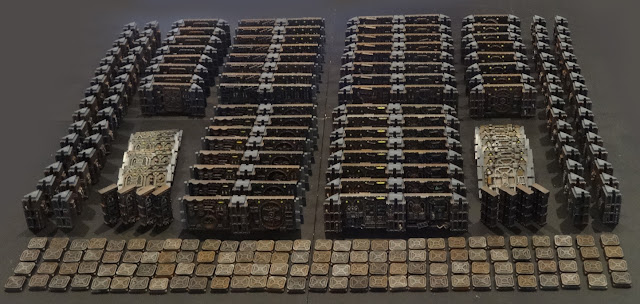
Keen to avoid such waste, we formed a plan. Well, more of a pact. We'd split the cost of two of the boarding actions terrain set (that's two of the big sets, or four times what you'd get in the Kill Team sets, or more prosaically: shitloads). Then we'd get together over a series of sessions and build and paint it together.
The pact worked, despite several bouts of Covid and other random hurdles.
Unlike most of the terrain I've purchased for myself and failed to finish painting, the group effort strategy absolutely enabled us to power through the grind of removing mould lines and painting very, very repetitive details to get a giant space dollhaus named Deep Space Nein.
This may have been efficient in terms of work hours, but lining up our three schedules (Harvey does shift work) was more of a challenge. We started in January this year, and you'll note it's now late August. Still, afer three or four day-long sessions and the occasional evening spent together, sometimes with Maisey helpfully standing in when one of us couldn't make it at the last minute, we got it done. We painted for longer than our attention spans would've held out had we been painting alone. Honestly that was the main gain... that, and the decision to do a quick, basic job.
 |
| The first recorded photo of the project, back on the 30th of January. |
 |
| Buy lots of primer. |
 |
| more thkullth, mathter? |
 |
| All finished |
 |
| Two sets fits in one box... just. Minus the boards, of course. |
The Process
Painting was very, very simple. Most of the skill was less in its application and more in figuring out the most efficient order of operations, which I shall present here in case it's useful to anyone else:
- Spray prime black.
- Do a deliberately patchy zenithal spray with a dark or mid-brown. We used several different red/orange brown sprays we had lying around. The exact colour doesn't matter so long as it's kinda dark and rusty.
- Drybrush all over with Leadbelcher or similar (we used Army Painter Gunmetal).
- Apply a lighter drybrush all over with Vallejo Air Steel or another bright silver colour. Focus on the edges.
- Drybrush a bone colour over all the skulls. So many skulls. The skulls, yes. Skulls.
- Throw a mid-brown shade over the skulls. We used thinned down Army Painter Dirt Spatter.
- Drybrush the skulls with Citadel Wraithbone (or similar bright bone-ish off-white).
- Use Citadel Contrast Black Templar to block out all screens, broken lights and cables.
- Use Citadel Contrast Gore-grunta Fur on all the brass plaques.
- Apply white paint in the middle of all the intact lights, and draw any designs you like on the many, many screens. Correct your freehand designs with black paint. Note: we didn't draw designs on every screen; we figured some would be switched off. We figured this to protect our sanity.
- Glaze the active lights with various light, vibrant colours. We used Flash Gitz Yellow for the basic lights, for example.
- Make a glaze by mixing Warpstone Glow with gloss varnish (we used Citadel 'Ardcoat). Apply the glaze to all active screens. The ratio was pretty improvisational, but memory tells me it was 1 part paint to 2 parts varnish. Experiment for yourself and see what works best!
- Apply pure gloss varnish to any broken screens or lights.
Furnishings?
Now that we have our dollhaus I imagine we'll buy furniture. I've already got the escape pods and med bay on order; time will tell what else we get our mits on, since James is nothing if not fickle in his terrain releases.


This is an amazing project, and it turned out so very well. Aside from hulk-ish stuff, it should also work for general building interiors and necromunda sorts of things too... lots of decayed industrial walls in the Imperium.
ReplyDeleteAnd yes working with someone is a definite motivator (and sometimes also an anchor in both senses of the word).
Thanks mate! Yeah it feels like a really useful bit of terrain to have in the arsenal 😁
Delete