
Greetings bunker dwellers! It is I, Jeff of the... well, the Beard Bunker actually. I've finally moved in permanently from the old site so you'll be seeing me rather a lot more going forward. To kick off, I thought I'd return us to the dry desert heat of North Africa with a companion project to Maisey's Aussies, my Bolt Action Italians:

This lot are the first squad of the army. Italian formations of the period are a bit weird to British eyes and making them fit Bolt Action's rules took a little finagling. I'll be talking more about the historical aspects of the army in future posts so stay tuned for that. Today, instead, we'll be focusing on the models and the painting. Let's get to it!
The models are Perry Miniatures' range of metal Italian WW2 chappies. Now, before we get much further, I have to have a tiny grumble: I love the Perry's plastic stuff, I've used a lot of it, this is the first time I've used the metals aaaand... I wish I could say I was very impressed. The posing and anatomy seems fine enough although the one piece castings cause the usual problems there. But especially the faces and hands seem very... rushed? Is the only way I can think to say it. Some of them look like Odo from Deep Space Nine. Combine that with a slightly rough casting texture and you have not a great result. It's not a real shame as the Perrys clearly know what they're doing it's just that the quality simply wasn't there on these.
All that being said: We aren't exactly over-endowed with Italian miniatures to use and these do seem the best of the bunch out there. It just knocked a bit of my enthusiasm for the project early on. Now I've got the first squad out of the way I feel a bit better about the project and am pressing on. I just figured I'd do a slightly more impressionist version of my usual painting and let the mass effect do it's work. So armed with a bunch of internet research (very useful thread here), an old Osprey book and pints of tea, I set to.

My usual approach to WW2 figures is to deal with the vast bulk of the uniform first, generally by drybrushing, as that gives a bit of texture to the cloth that contrasts nicely with the smoother helmets and other gear. I also make sure to add uniform insignia and squad markings as, lean in, I need to whisper this... painting monochrome WW2 stuff can be a bit boring otherwise. Handily, the slightly slapdash supply situation the Italians had also gives you a chance to scatter some of the grey-green temperate bits of kit among the units. That and the occasional cork helmet (rarely worn in combat sure, but I figure a surprised unit) means that there's a nice bit of variety. But for the most part the painting starts with a solid basecoat of Vallejo Dark Sand, shaded down with Seraphim Sepia and then highlighted with Dark Sand mixed with increasing amounts of Pale Sand. If you want to introduce some tonal variation (ping) to the unit you can do so here by varying the final tone. Some ending up a bit lighter, others darker, the sun tended to bleach uniforms. I'll confess, I didn't bother on this one. Might on some more veteran troops.

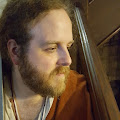
Something I was pondering was how to get the darker skin tone that tanned, Mediterranean troops deployed to the desert would have. Fortunately, I recently realised that by adding Beige Brown and Burnt Umber to the skin tone spectrum allows you to portray most skin tones by adjusting what wash you use. In this case a Beige Brown and Cadian Fleshtone mix shaded with Reikland Fleshshade. Highlighting up gradually to Cadian Fleshtone left me with that "long time in the sun" look I was going for. The other problem was the rifle furniture which is a rather strange orangey tone. I then had memory turn a card and recalled Charlie using Chestnut Ink as a glaze to get the varnished wood look. I busted that out and voilà, orangey Italian rifles. Talking about all this, it's time for tips folks: there's always a problem with keeping things consistent across an army especially if there is a bit of time in between painting sessions. Solve them with a crib sheet that you write as you develop the colour scheme like this:

These have saved me many, many times. As an example, I'd have completely forgotten that I'd added that dash of German Camo Dark Green to the temperate uniform basecoat. Now, I could go on and on and on here but instead, I'm going to reign myself in and save some content for future chapters in the project. I'll do linking bits at the bottom of each part to help navigation

This lot are the first squad of the army. Italian formations of the period are a bit weird to British eyes and making them fit Bolt Action's rules took a little finagling. I'll be talking more about the historical aspects of the army in future posts so stay tuned for that. Today, instead, we'll be focusing on the models and the painting. Let's get to it!
 |
| Ignore the base rims, that's not a mistake to be fixed later, no... it's a stylistic choice honest... |
All that being said: We aren't exactly over-endowed with Italian miniatures to use and these do seem the best of the bunch out there. It just knocked a bit of my enthusiasm for the project early on. Now I've got the first squad out of the way I feel a bit better about the project and am pressing on. I just figured I'd do a slightly more impressionist version of my usual painting and let the mass effect do it's work. So armed with a bunch of internet research (very useful thread here), an old Osprey book and pints of tea, I set to.

My usual approach to WW2 figures is to deal with the vast bulk of the uniform first, generally by drybrushing, as that gives a bit of texture to the cloth that contrasts nicely with the smoother helmets and other gear. I also make sure to add uniform insignia and squad markings as, lean in, I need to whisper this... painting monochrome WW2 stuff can be a bit boring otherwise. Handily, the slightly slapdash supply situation the Italians had also gives you a chance to scatter some of the grey-green temperate bits of kit among the units. That and the occasional cork helmet (rarely worn in combat sure, but I figure a surprised unit) means that there's a nice bit of variety. But for the most part the painting starts with a solid basecoat of Vallejo Dark Sand, shaded down with Seraphim Sepia and then highlighted with Dark Sand mixed with increasing amounts of Pale Sand. If you want to introduce some tonal variation (ping) to the unit you can do so here by varying the final tone. Some ending up a bit lighter, others darker, the sun tended to bleach uniforms. I'll confess, I didn't bother on this one. Might on some more veteran troops.

Something I was pondering was how to get the darker skin tone that tanned, Mediterranean troops deployed to the desert would have. Fortunately, I recently realised that by adding Beige Brown and Burnt Umber to the skin tone spectrum allows you to portray most skin tones by adjusting what wash you use. In this case a Beige Brown and Cadian Fleshtone mix shaded with Reikland Fleshshade. Highlighting up gradually to Cadian Fleshtone left me with that "long time in the sun" look I was going for. The other problem was the rifle furniture which is a rather strange orangey tone. I then had memory turn a card and recalled Charlie using Chestnut Ink as a glaze to get the varnished wood look. I busted that out and voilà, orangey Italian rifles. Talking about all this, it's time for tips folks: there's always a problem with keeping things consistent across an army especially if there is a bit of time in between painting sessions. Solve them with a crib sheet that you write as you develop the colour scheme like this:

These have saved me many, many times. As an example, I'd have completely forgotten that I'd added that dash of German Camo Dark Green to the temperate uniform basecoat. Now, I could go on and on and on here but instead, I'm going to reign myself in and save some content for future chapters in the project. I'll do linking bits at the bottom of each part to help navigation
Like this! : Part two (this will totally have a link one day)
Until then lovely dwellers,
TTFN
Comments
Post a Comment