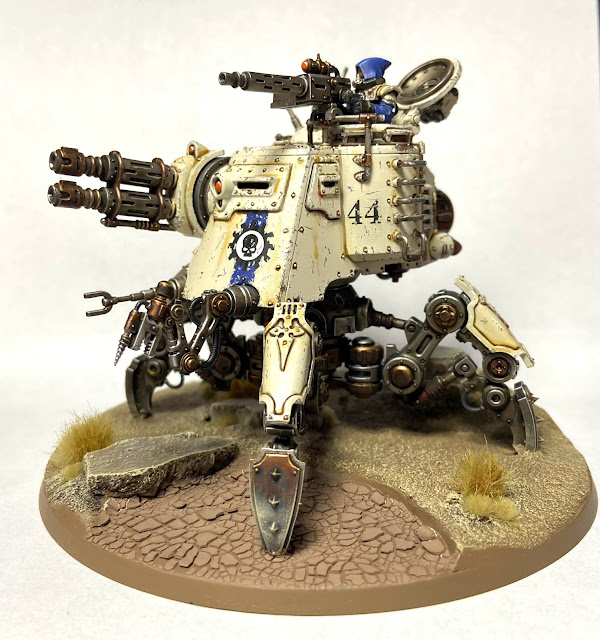
As promised in the last Admech Post I've got the last model in the initial 1000 point Crusade Roster for you today. It a big 'un. We have K-44/4, an Onager Dunecrawler. As with all GW naming I ignore about half the name and just call it the Dunecrawler, or Spidey Tank. Which whenever gets mentioned on our Discord chats is automatically followed by at least 3 different and simultaneous renditions of the old school Spiderman theme tune. This has not stopped being funny yet.
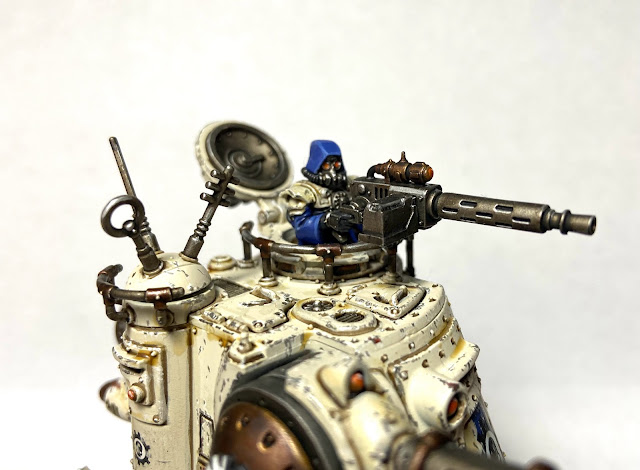
Following the standard template painting pattern for Akaros units the painting called for a mostly bone/white scheme. This was best achived using subassemblies. The legs, hull, commander, and shooty bits where all kept seperate and undercoated in the most appropirate colour. The hull was basecoated black and then sprayed Wraithbone, the legs black then Leadbelcher, the rest just got black. It means the bulk of the work is already done to a standard far higher than I can manage with a brush.
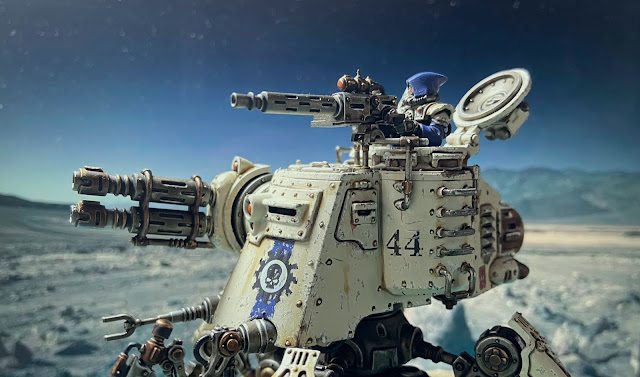
This one also allowed me to get a little more creative with the weathering process. It's still the same formula as before. White Scar chips applied with a tiny brush with leadbelcher added to the middle of the largest chips. However on a larger model such as this it gives more room to do it properly. The staining comes from Vallejo Fuel Stains weathering effect paint. There is also a few rust streaks added using Vallejo Model Air Rust.
With this being larger I've added a number of decals here and there. I always feel that little icons, warning symbols, vehicle numbers, etc just make the model feel more lived in. Even if it is just a few.
I apologise for some of the photos. This model is a little too big for my normal setup and I'm rubbish at photos anyway.

Basing! I keep threatening to talk about the basing, so here goes. With this base being so large I descided to help add some interest by using some airdry clay to create some undulations. Hopefully this makes it feel like a section of natural landscape as opposed to some sand glued to a slab of plastic. I've also chose to add a dried up water feature. I read in a gardening book that water features are a relaxing focal point for the garden so maybe it'll be a nice relaxing focal point for the base. This was airdrying clay and a healthy dose of Agrellan Earth. I left the Agrellan Earth it's natural colour but I did paint the base underneath so the cracks appeared the right colour. Next I picked out where I was going to add rocks. I use two different kind of rocks, one is ground up cork bark (mine is Fine Cork Rubble from War World Scenics), and large slabs which is actually just concrete (Specifically Hobby Round: Concrete Rubble Mix from Gale Force Nine). The bits that aren't covered in rocks are covered in a layer of fine hobby sand. Once all this is dry it gets a solid coat of Steel Legion Drab. The rocks get a wash of Agrax Earthshade. Then the whole thing is dry brushed Tallern Sand, Usabti Bone, and a final highlight of Wraithbone on the rocks. Then I add tufts to taste. The finishing touch is a quick rimjob to tidy up the sides of the base and we're done.
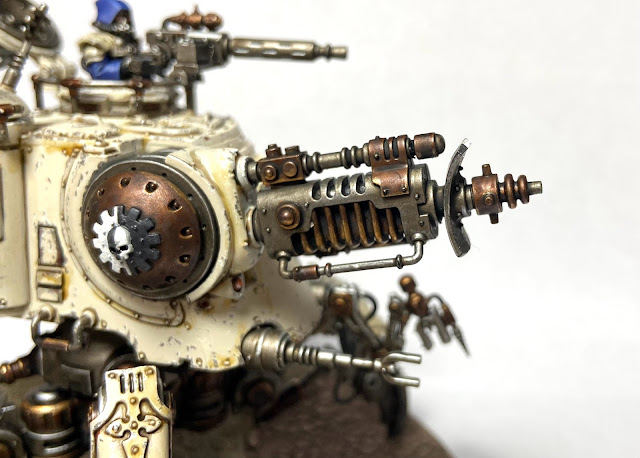
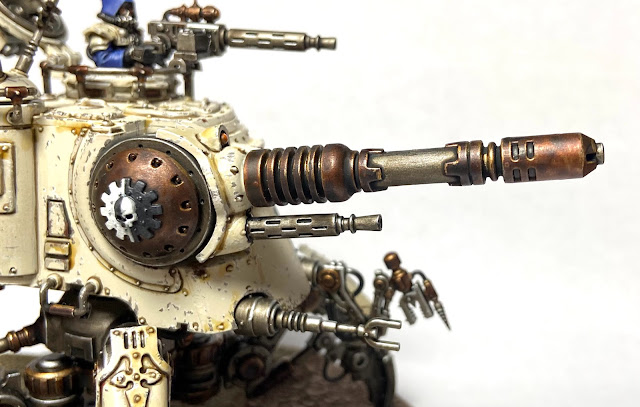
I also took the opportunity to magnetise the main weapon options because frankly I couldn't decide. So I can have the Eradication Beamer for maximum steampunk points.
The Neutron Laser, for maximum Bond Villian points (Yes, it said in my worst 'Doctor Evil' voice whenever I fire the Neutron Laser)
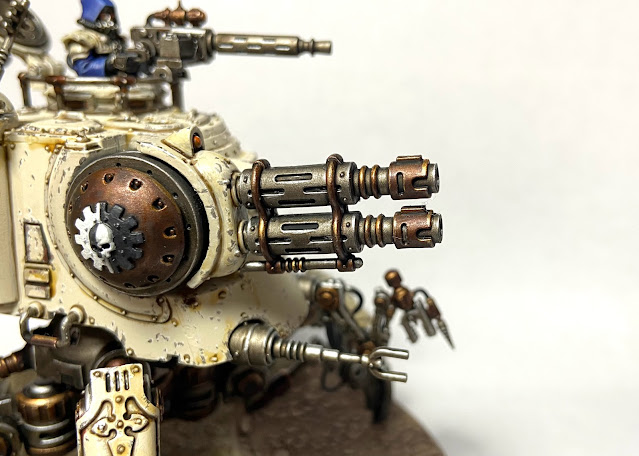
The Twin Onager Heavy Phosphor Blaster, for maximum number of syllables in one name points. This is on the one I've taken in the Crusade Roster as it's the most flexible in my opinion.
So that is the initial Crusade Roster covered. Fret not, I've been working on the first wave of reinforcements. The first of which has been finished and we'll cover next time it's my turn to blog!


Quite nice! The weathering and such works out so much better when you have a large surface to work with. Appreciate that you carried it over the decals too.
ReplyDeleteThe basing is also very good, particularly the dried pool look.
I thought there was a fourth gun option, some sort of multi missile thing?
Thank you! It is always my standard process to paint the model to a clean standard, then add decals, then added chipping and weathering. Those decals need to get dirty to bed them in. It would look really odd having them untouched by the weathering.
DeleteThanks, the Agrellan Earth really is a great paint/texture/thing.
There is a forth option, some kind of anti-aircraft autocannon/missile array thingy but is used the same components as the Twin Onager Heavy Phosphor Blaster. So I had to pick on that one. I guess with a raid on a bits site and some fanangling you could get all four to work.